Growing Blog
How to Make Perfect Grain Spawn For Growing Mushrooms At Home
Grain spawn is the traditional way to propagate mushroom cultures. Starting from just 1 liter of sterilized grain and a slice of culture from a petri dish, the mushroom mycelium can be expanded to provide more than 1000 liters of spawn.
One jar can be used to create 10 jars, which can be used to make 100 jars, which can be used to make 1000 jars, all within a few short weeks!
That’s a whole lot of spawn and can be used to produce thousands of pounds of mushrooms. Having properly prepared, sterilized grain with the right moisture content is key to the success of mycelial expansion.
Types of Grains
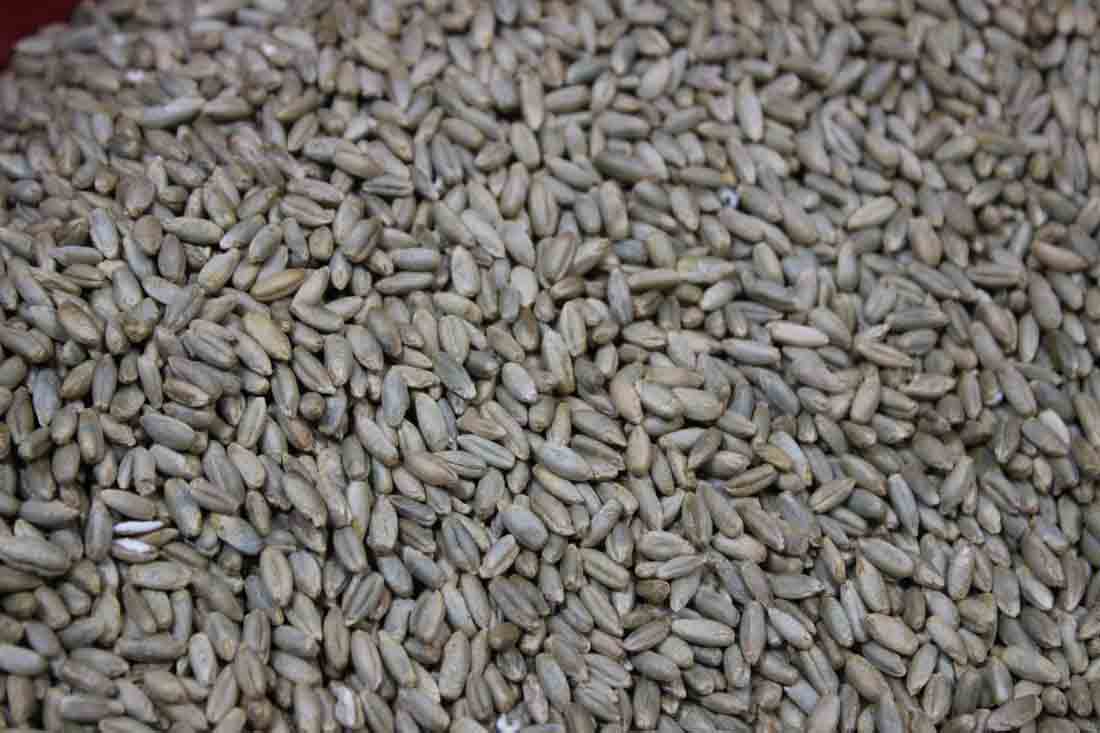
Many different types of grains can be used for spawn – including wheat, rye, brown rice, white rice, wild bird seed and even popcorn. Without a doubt, however, the most common grain used for mushroom cultivation is Rye. This is because of Rye’s water absorbing qualities, nutrient makeup, and, well, mushrooms seem to like it.
4 Steps to Making Grain Spawn
You can make grain in 4 easy steps. (Read the full article for thorough instruction.)
Step 1: Rinse and clean the grains, soak in water for 12-24 hours.
Step 2: Cook the grains for 15-20 minutes so that they absorb water.
Step 3: Drain and dry excess moisture from the outside of the grains.
Step 4: Load grain into mason jars and sterilize for 90 minutes at 15 PSI.
Things You’ll Need
- Cereal Grain (preferably rye)
- 5 Gallon Bucket or similar container
- Stove and large pot.
- Strainer or screen.
- Mason jars and polyfill. (or synthetic filter disc)
- Pressure Sterilizer.
Although the following method is a little labor intensive, it’s a foolproof way to get perfect grain spawn every time.
STEP 1: RINSE and SOAK
Measure the desired amount of grain, keeping in mind that the rye will expand when moistened and be almost double its original size. You want to have your jars 2/3’s-3/4’s full when fully sterilized so just use a quart jar and measure out 1 quart of dry grain for every 3 quarts of desired spawn. Throw in a little extra for good measure.
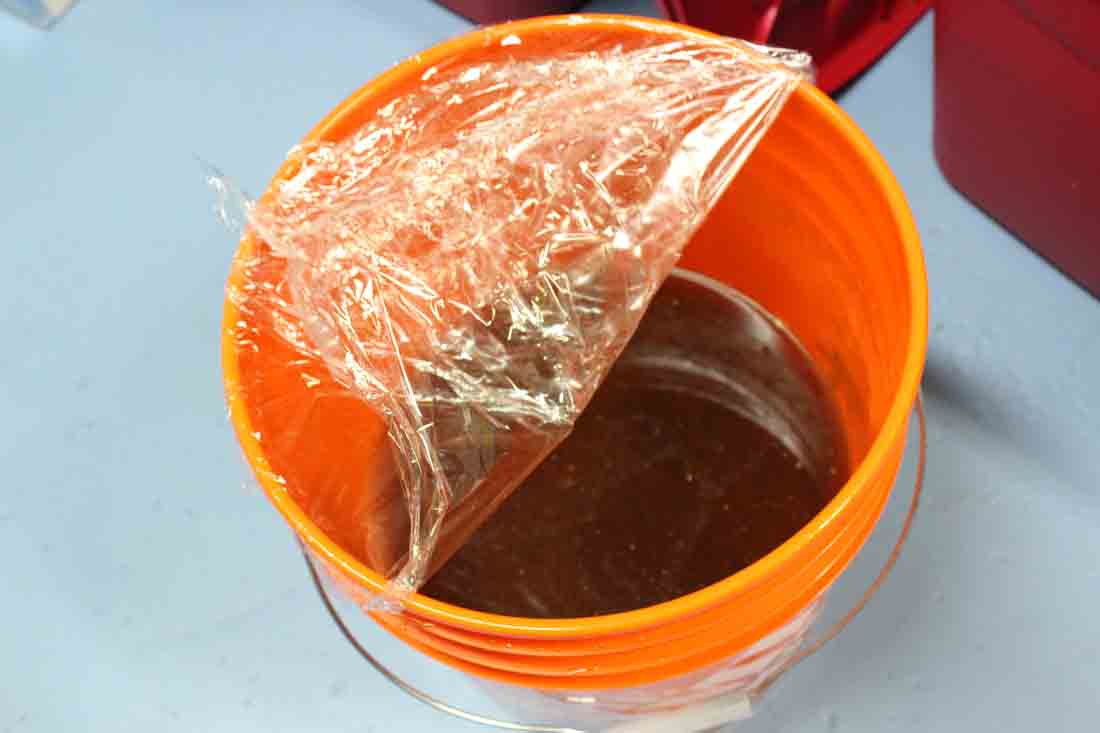
The coffee changes the pH a bit and is thought to increase yield, while the gypsum is helpful to prevent the grains from sticking together. For ten jars, I like to use about a tablespoon of gypsum and a cup of coffee.
Let the grains soak for 12 -24 hours. This will allow the grains to absorb water, and will cause many contaminants to sprout, making them more susceptible to being killed through sterilization.
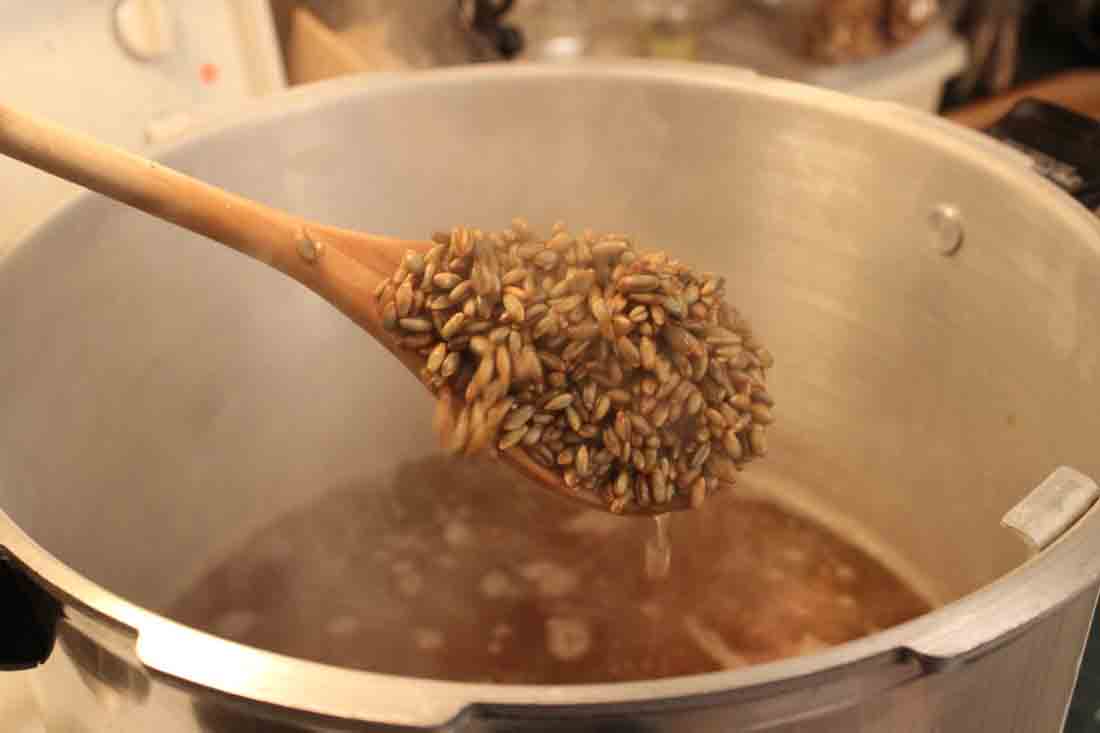
STEP 2: COOK
Cooking the grains will cause them to further swell and absorb water. It also softens them up substantially which allows for easier digestion by the mycelium.
I like to bring the grains to a boil in a large pot and let them simmer for 10-15 minutes.
Cooking them too long can cause many of the individual grains to crack open, which can increase the chances of contamination during incubation.
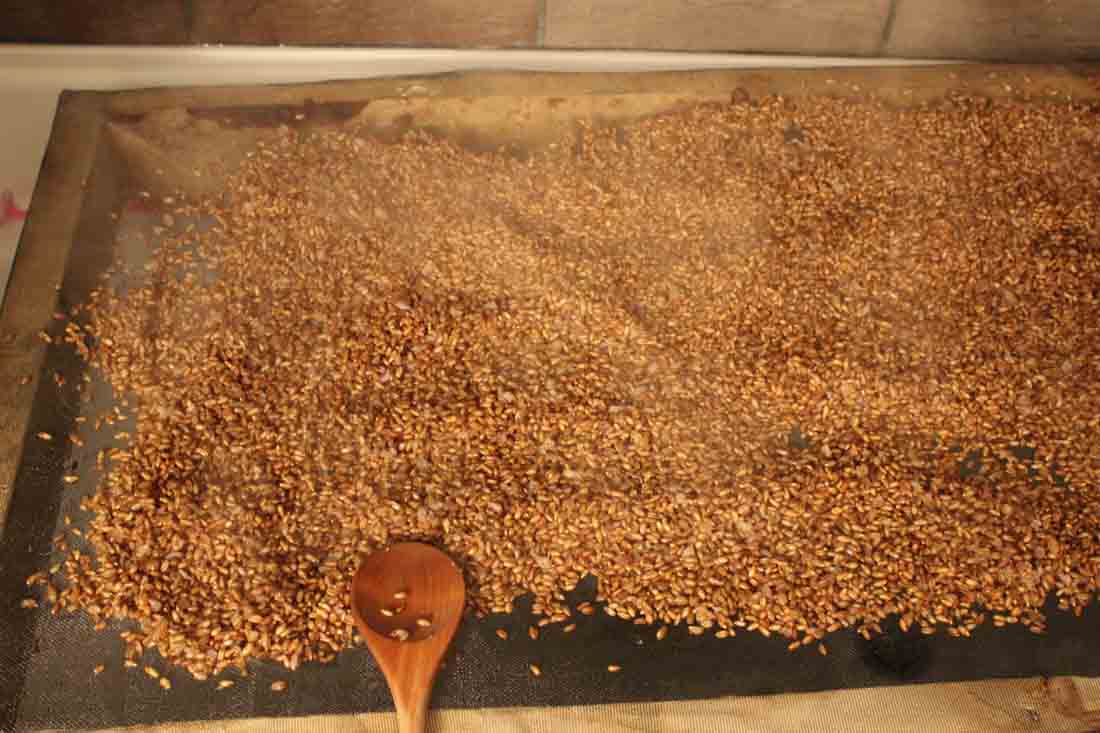
STEP 3: DRAIN and DRY
Another reason for cooking the grains is so that they can dry by steaming off.
Drain the boiling hot grains into a colander and shake it a number of times to let the steam evaporate. Follow this by spreading out the grains into a thin layer over a screen or towel. Allow the grains to dry for an hour or two. When ready, they should have no noticeable moisture on the outside of the grain.
Pick up a handful of grains to test. They should be loose individuals kernels, dry on the outside, and swollen with water on the inside.
STEP 4: LOAD and STERILIZE
Now that your grains are dry, load them into your jars up to about 2/3-3/4 full.
The jar lids should have a breathable filter to allow for gas exchange during incubation. This can be done in a number of ways. I like to simply drill a 1/4″ hole through the lid and pull a wad of synthetic pillow stuffing through the hole.
This will effectively stop contaminants but will allow the mycelium to breathe. Another advantage of this method is that jars can be inoculated with a culture syringe by simply injecting directly through the pillow stuffing.
Another option is to drill a few holes in the lid and place a synthetic filter disc between the jar lid and the screw cap.
These discs are available through different sources online and are made to fit wide mouth or regular sized mason jars. I also like to place the lid on the jar upside down, meaning the metal side is against the glass and the rubber seal is facing up.
This makes it easier when trying to open the lid in a sterile environment without having to pry it off with your fingers.
The final step in preparing your jars is to cover the lids with tinfoil. This will prevent water from the pressure cooker from spilling into your grain and changing the moisture content of the jar.
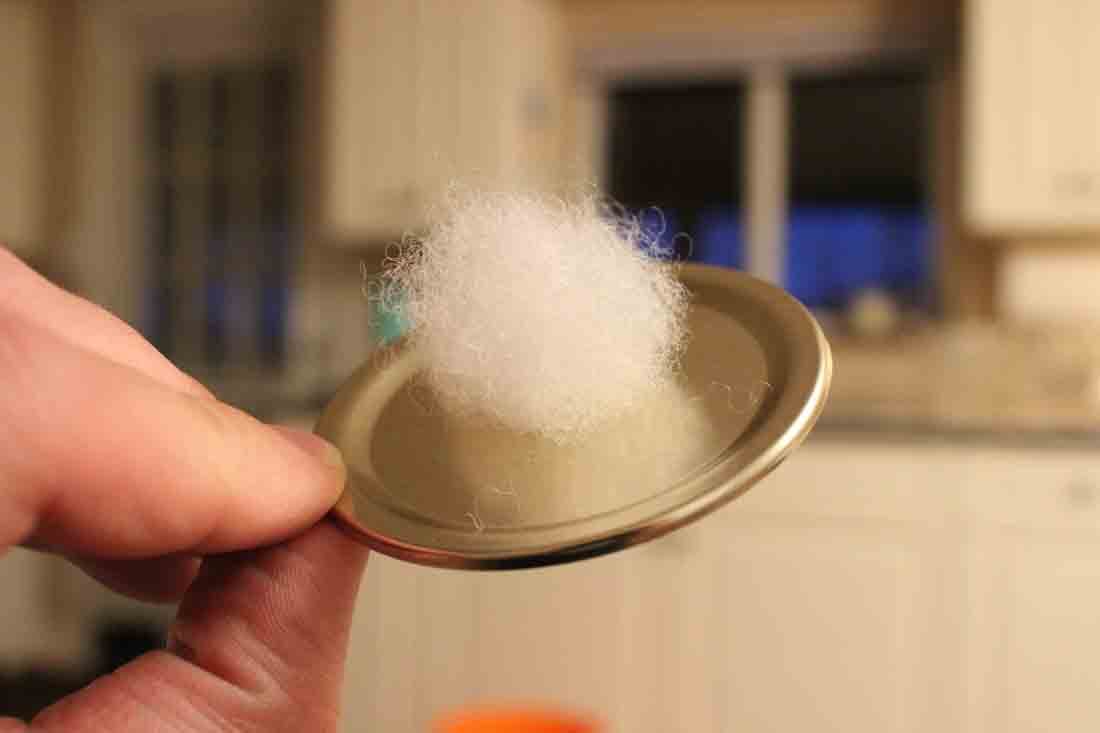
Breathable lid for gas exchange.
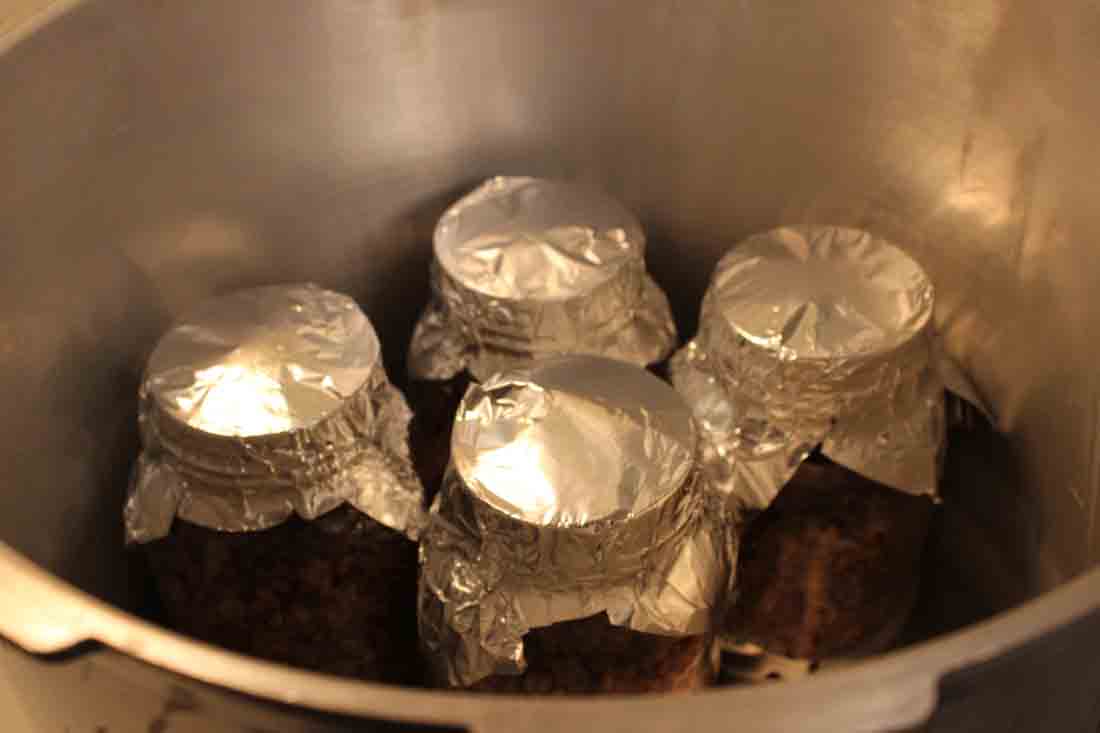
Tinfoil covered jars ready for sterilization.
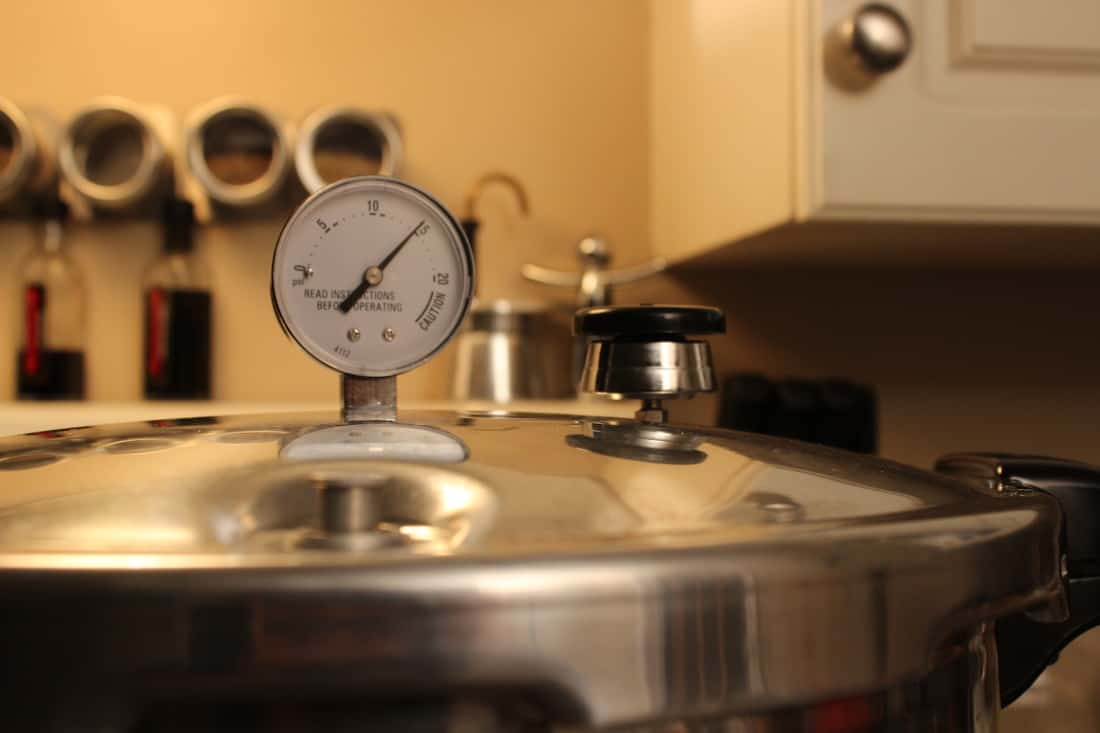
Sterilize for 90 minutes at 15 PSI.
Using a pressure cooker or autoclave, sterilize the grains at 15 PSI for at least 90 minutes.
You need a good quality pressure canner that can reach at least 15 psi and is large enough to fit your grain jars. The standard tool for the job is the All American. I have also used the much cheaper Presto canner for a long time with great results.
Either of these canners will do the job. Do not start the time until the pressure inside the cooker has reached a full 15 PSI. Once the 90 minutes is up, turn off the stove and walk away. Let it cool for at least a few hours before handling. Once cool, inspect the jars in a reasonably clean environment.
Check to see that there are minimal broken grains and that the grains aren’t globbed together.
You now have perfect grain ready for inoculation with mushroom culture!

Here are some products you might find useful:

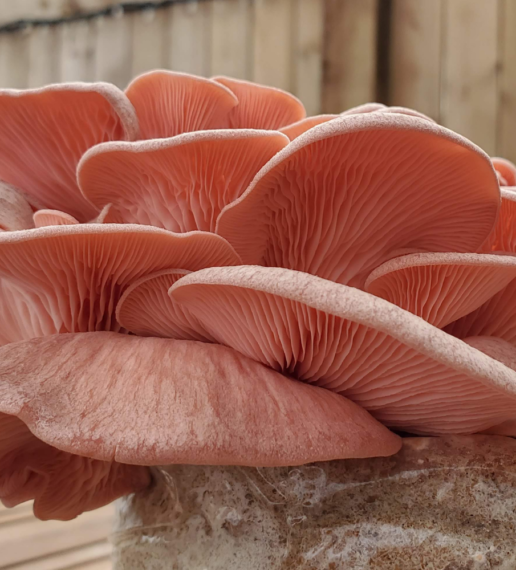
Growing Pink Oyster Mushrooms At Home (Easy Backyard Grow)
Pink Oysters mushrooms are one of the easiest species to grow. They are fast to colonize, produce a ton of fruits and aren’t at all afraid of less than perfect conditions. I just recently finished a fun backyard grow, and wanted to share how easy it is to produce a fresh bounty of one of
7 Tips for Beginner Mushroom Growers
New to growing mushrooms? If so, you may just be a little mystified – which is totally understandable. There is a ton of information to try and digest and make sense of. Terms like inoculation, agar transfers, laminar flow- what does all of this mean? And what of all this do I really need to know? I just want